
Organize inventory by where it lives: sites, rooms, boxes, shelves, and persons. Locations are the top-level places (e.g. "Main warehouse", "Truck 1"); containers—also called boxes—let you organize inventory inside a location. You can track what’s in each container separately and move whole containers between locations when needed.
Adding locations
In the sidebar, click your team to expand it, then click Manage Location. From there you can add locations (e.g. "Main warehouse", "Truck 1").
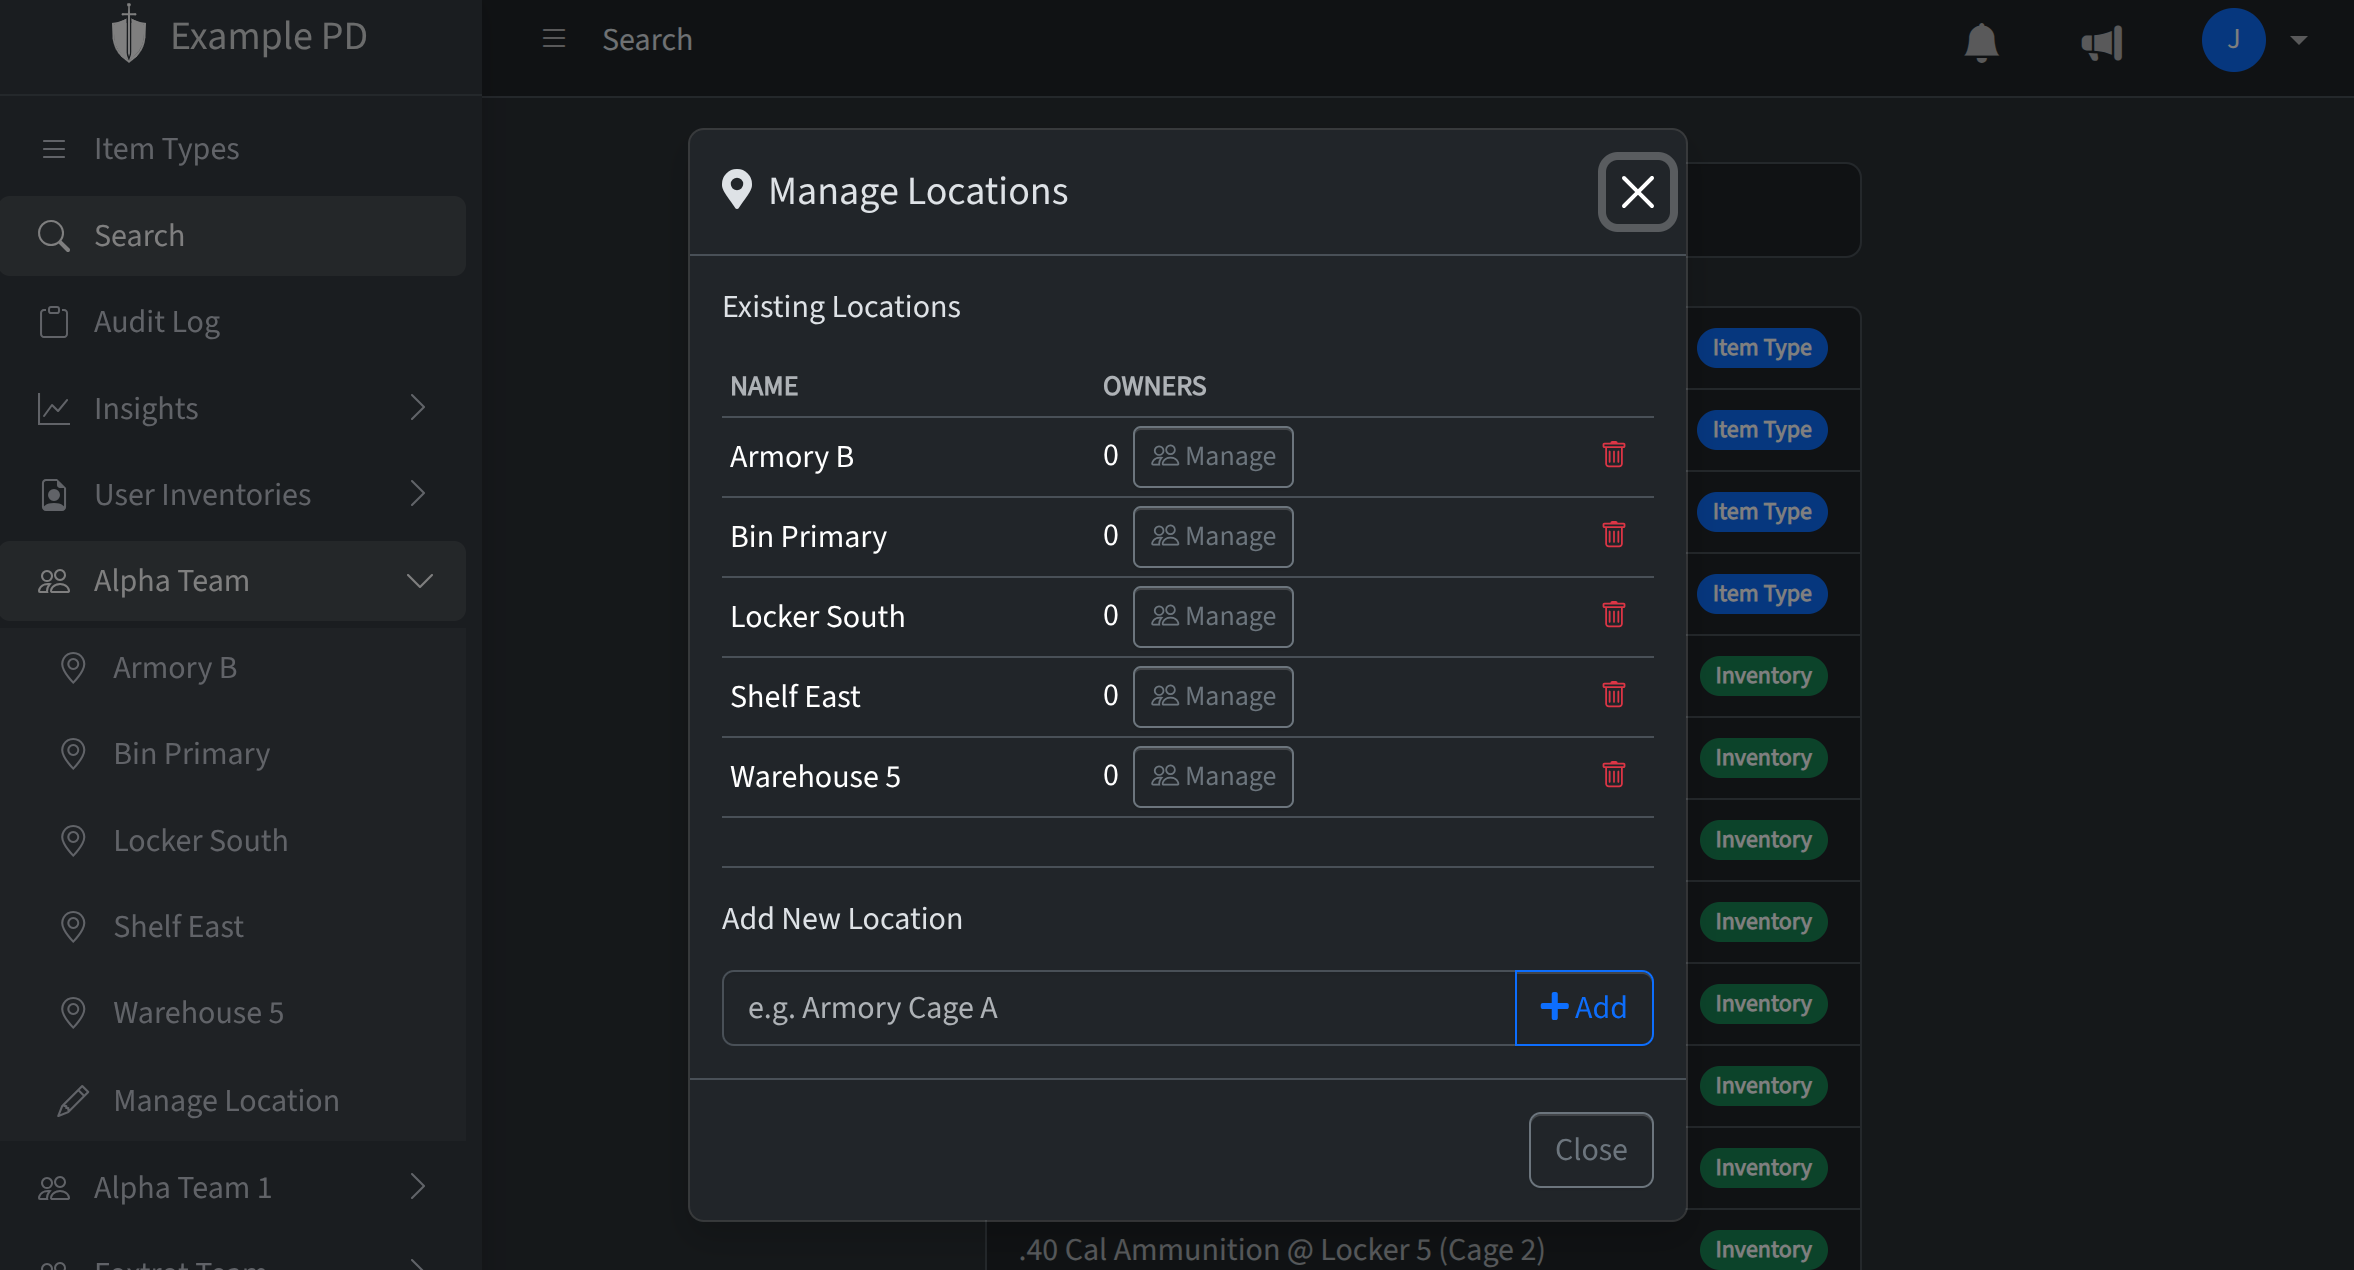
Location owners
You can assign one or more location owners to a location. Location owners are team members who can manage that location and who receive notifications when inventory at that location is low on stock or approaching expiration. Assign or remove location owners from Manage Location for the location.
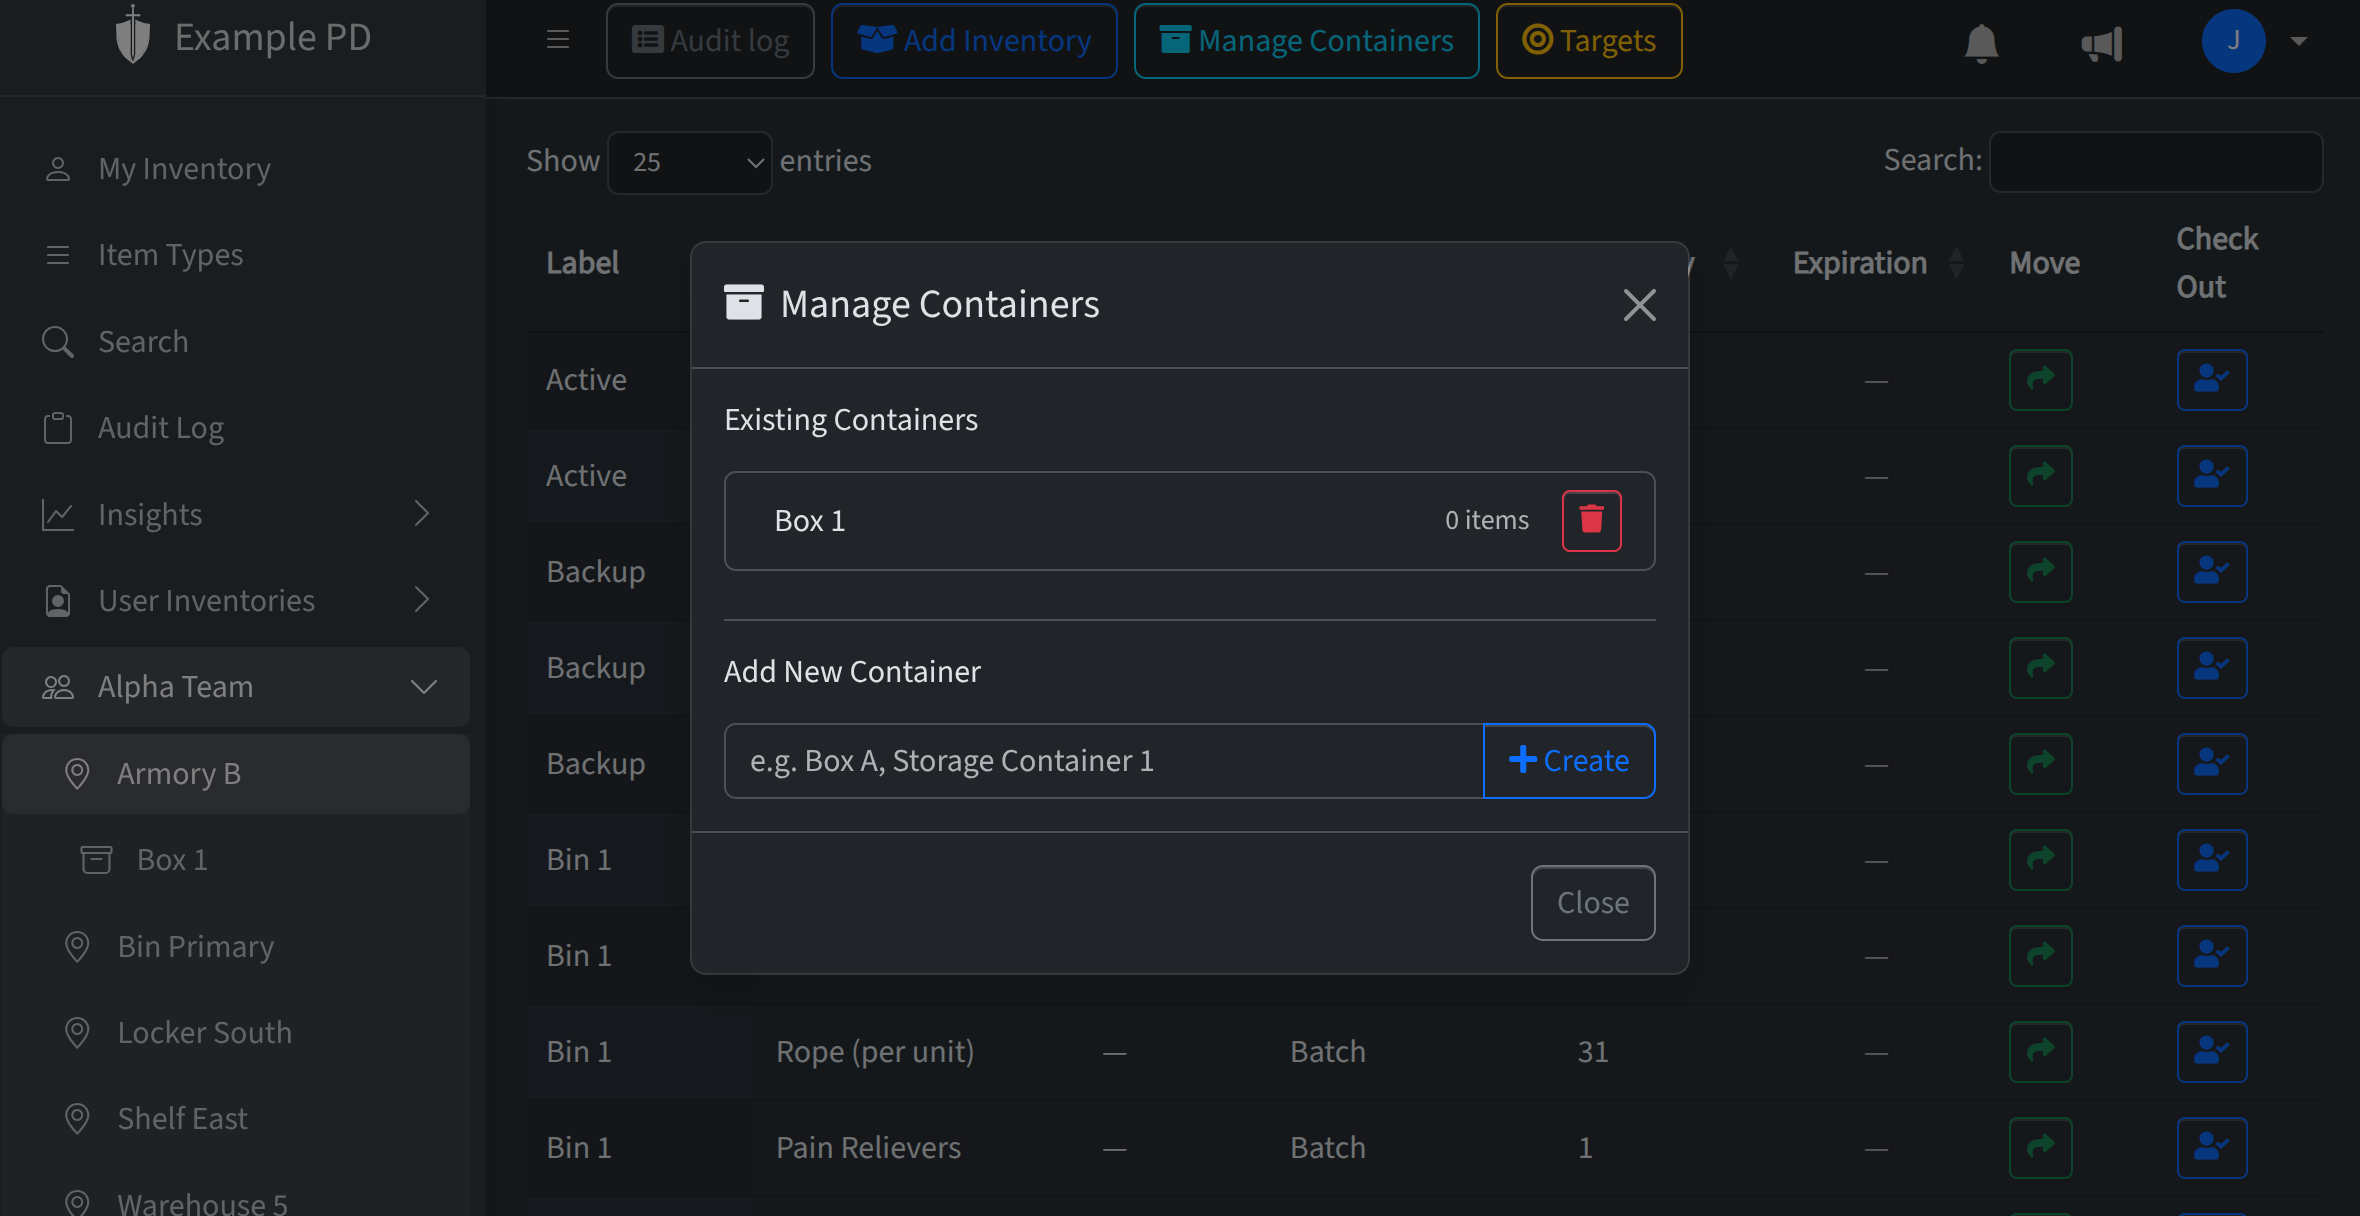
What containers are
A container belongs to a parent location and behaves much like a location: it has a name (e.g. “Shelf A”, “Ammo box 1”) and lives under one parent. Containers appear in the sidebar under that parent so you can open a container and see only the inventory inside it. You can have multiple containers per location.
How they’re used
Use containers when you want to break down a location into smaller units—shelves, bins, or boxes—and track quantity (or serialized items) per unit. Add inventory to a container the same way you add it to a location: open the container in the sidebar, then add or edit inventory there. Low-stock targets and expiration dates work per container too, since each container is its own “place” for inventory.
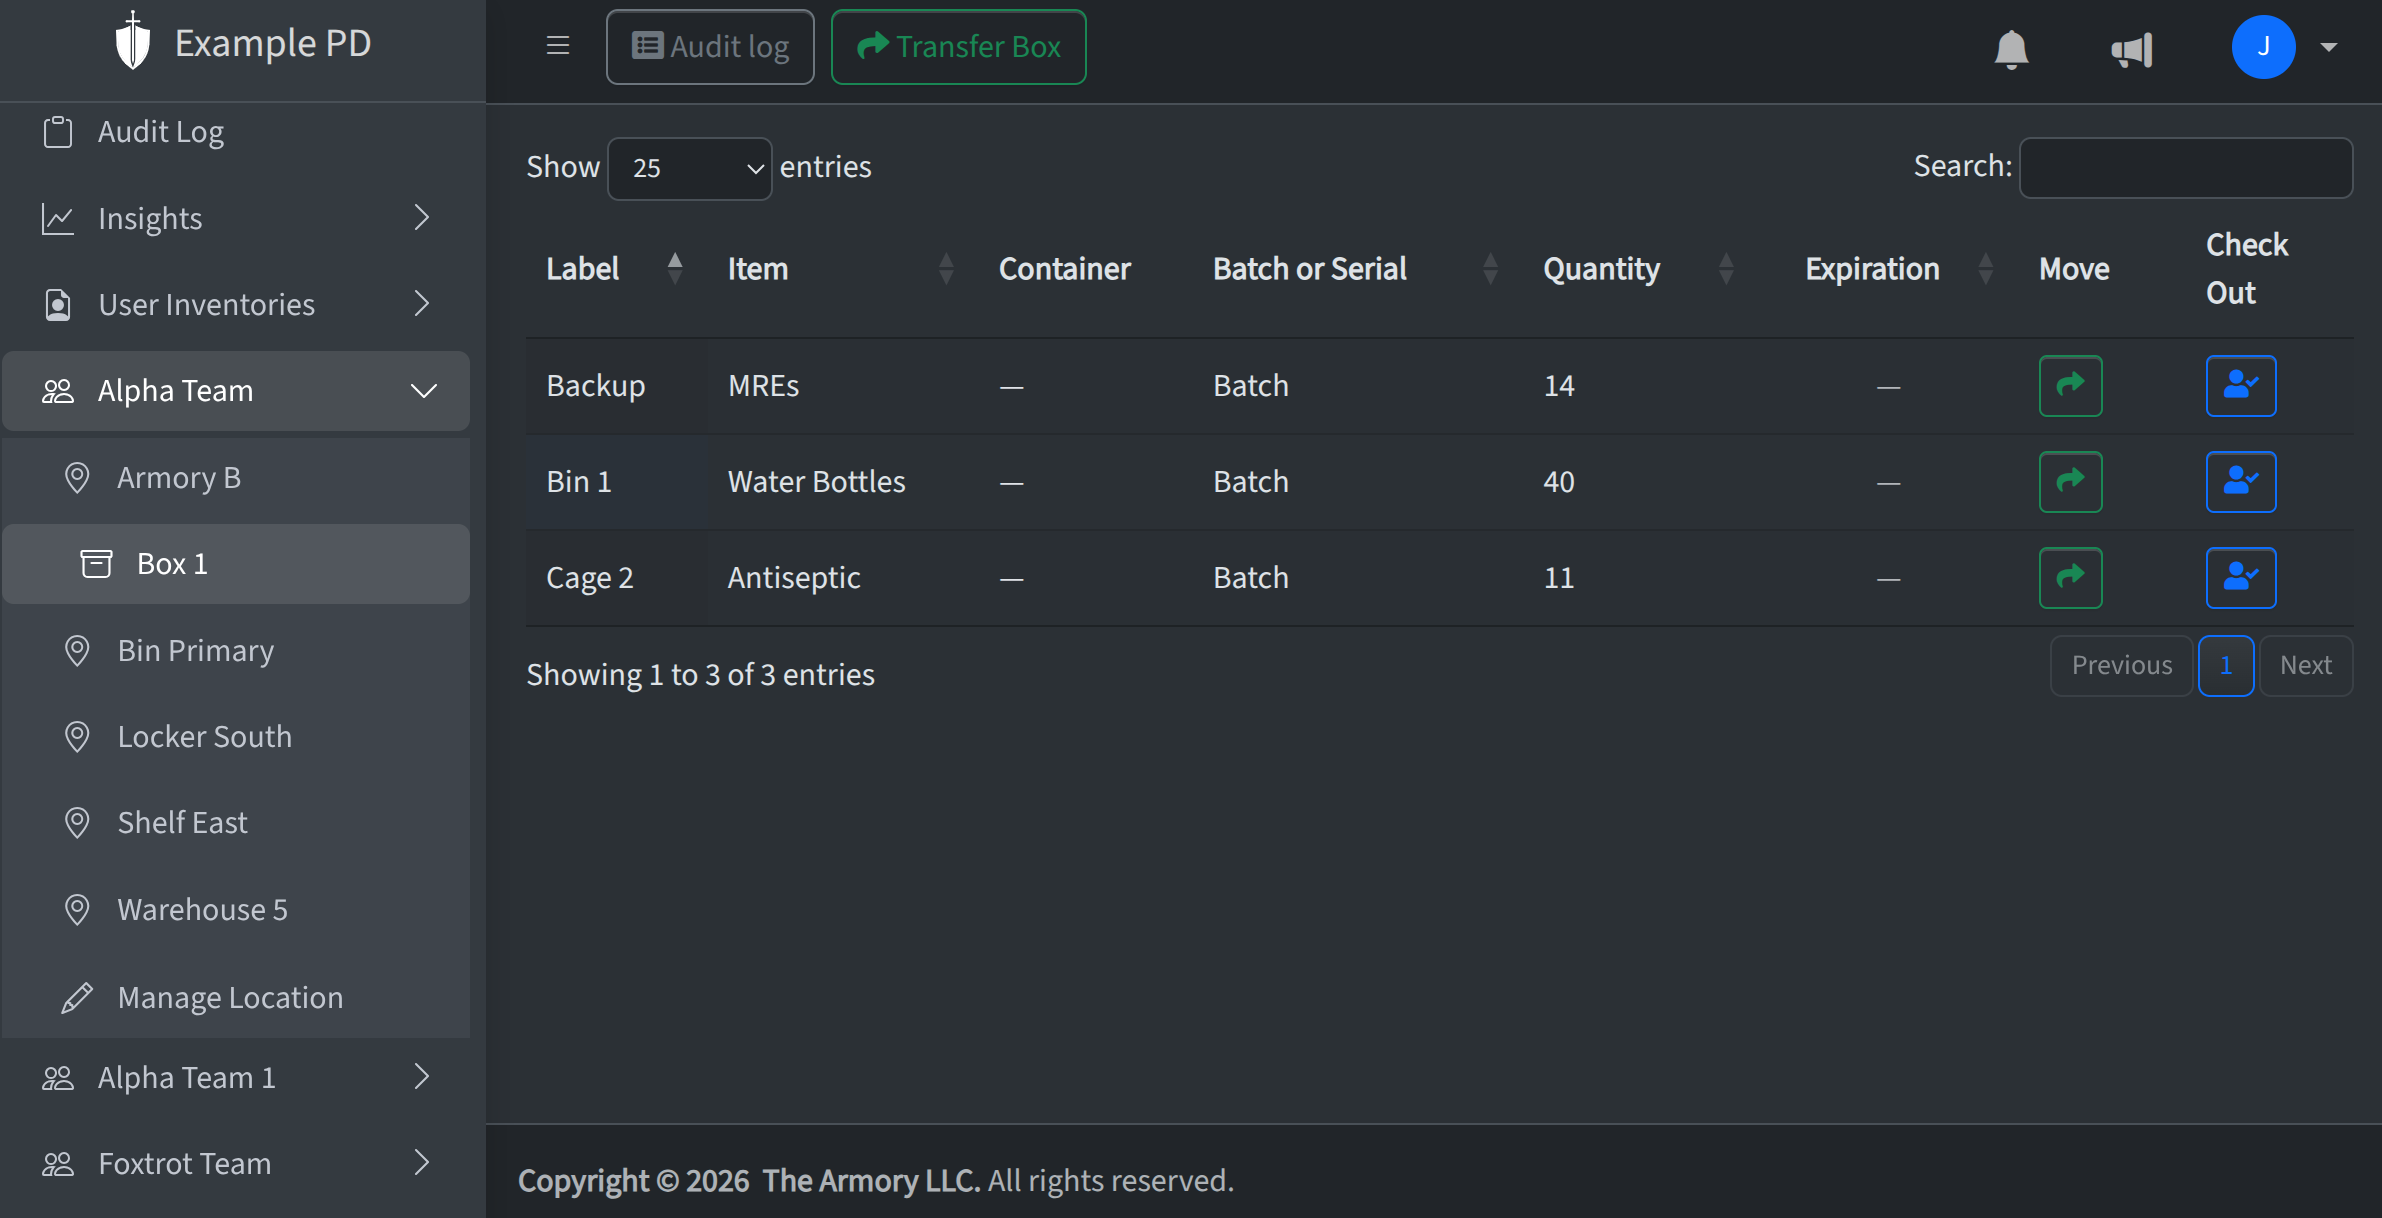
How items are tracked
Every inventory row (batch or serialized item) is assigned to exactly one location. That location can be a top-level location (e.g. “Armory”) or a container (e.g. “Shelf A” inside Armory). So items are tracked per container: when you view a container’s inventory, you see only the items in that box. The same item type can exist in multiple containers at the same location, each with its own quantity and optional target.
Actions you can take with containers
- Create a container — In the sidebar, open your team and click Manage Location. From there you can add boxes (containers) to a location. Give each one a name so you can tell them apart.
- Rename a container — Use the same Manage Location flow to edit a container’s name.
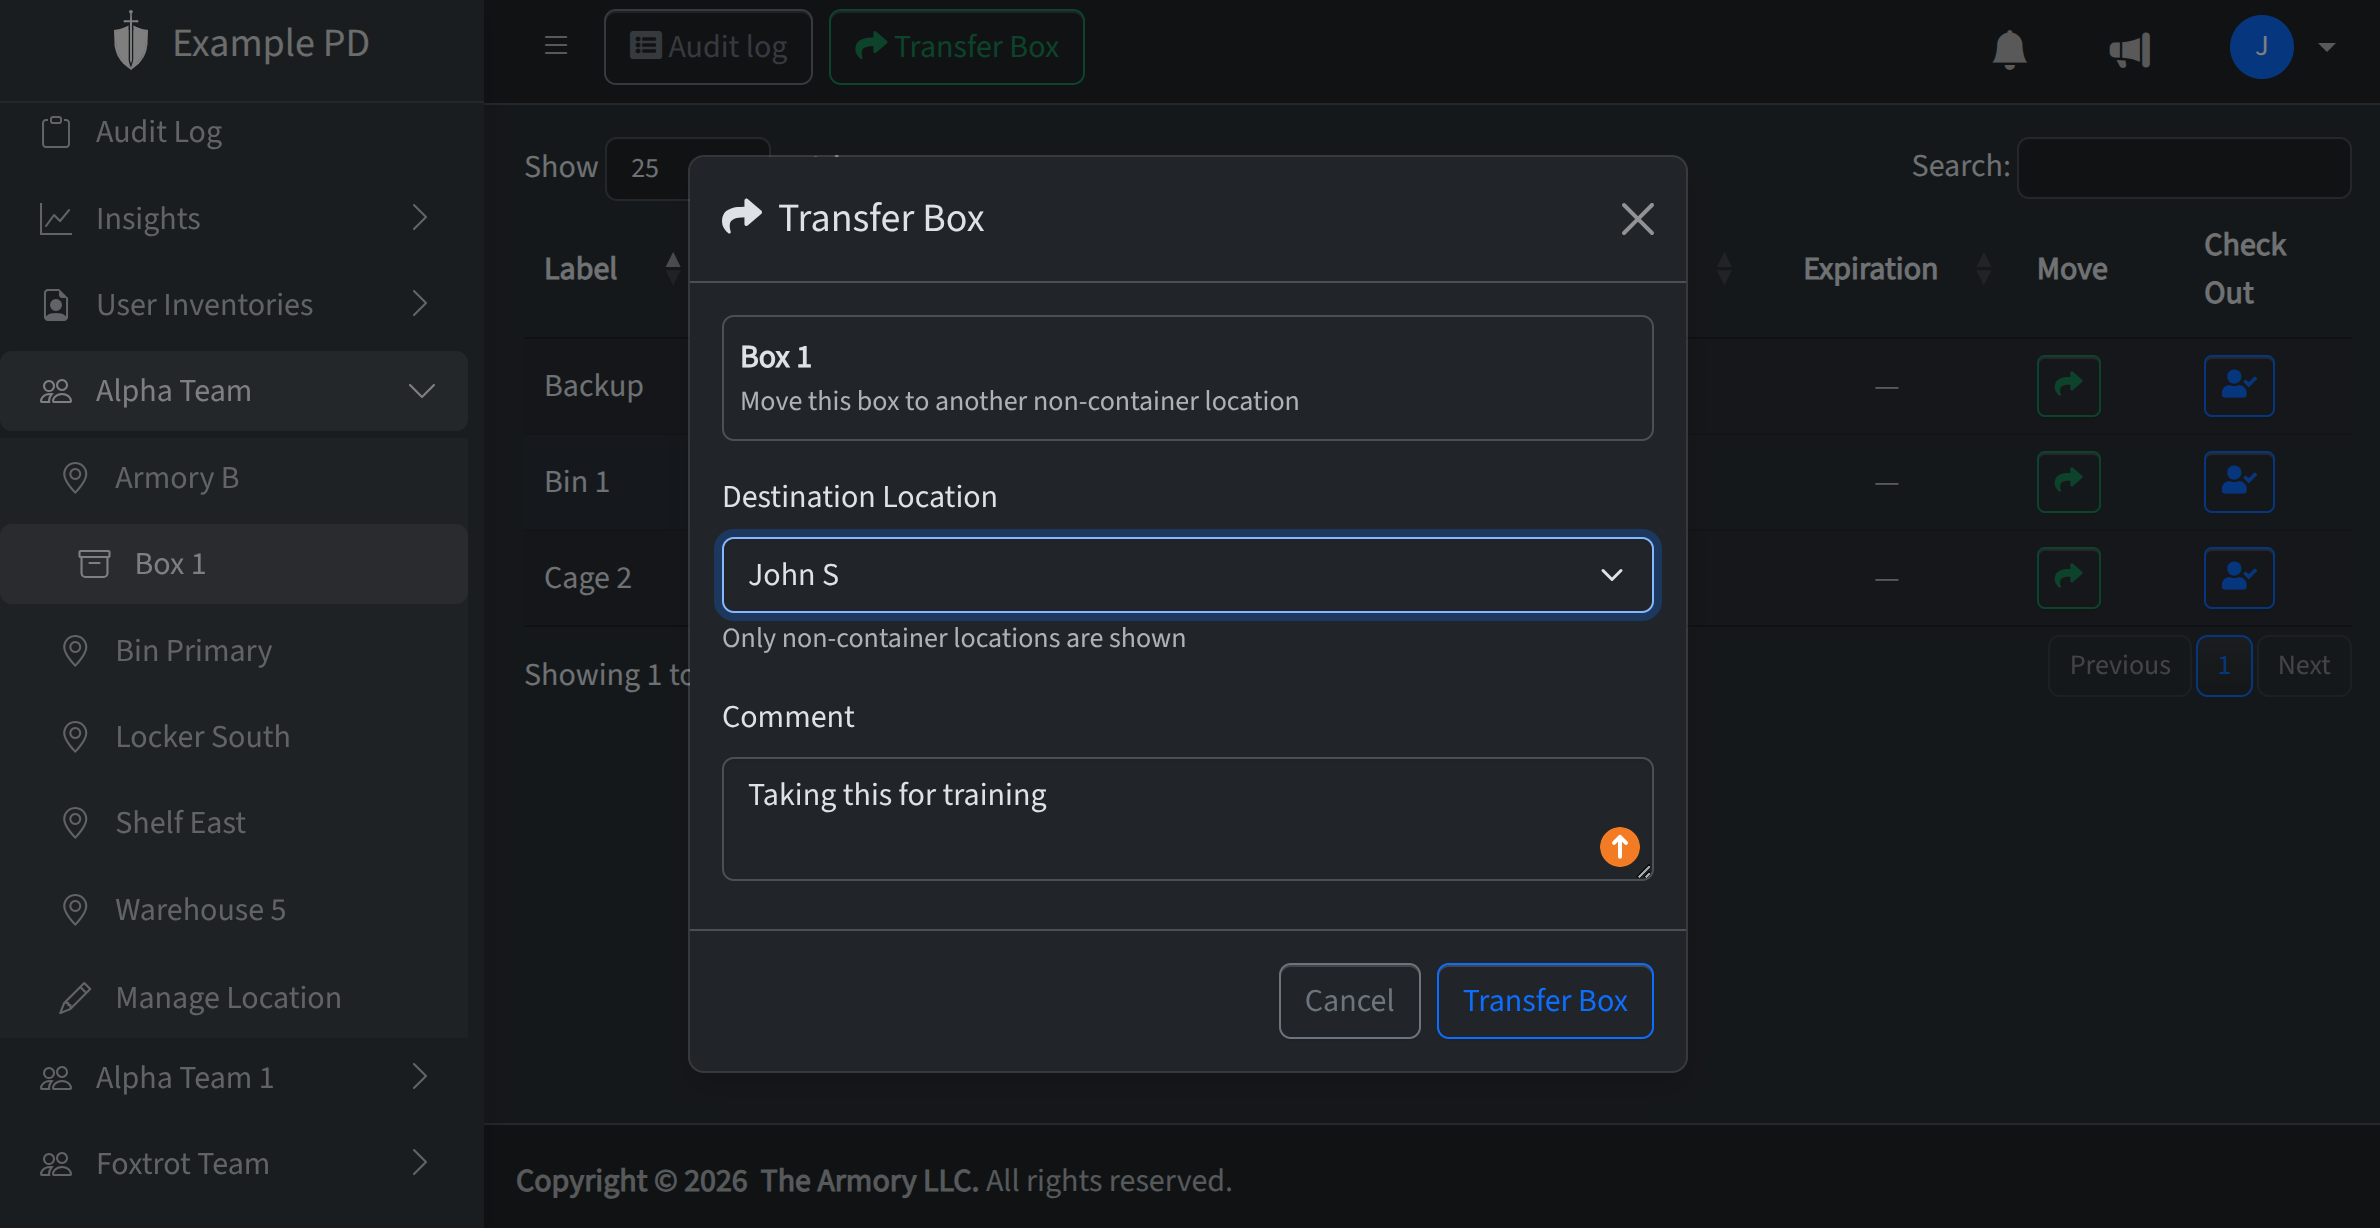
- Transfer a container — Move an entire container (and all the inventory in it) to a different location. Useful when a physical box moves from one site to another. You’ll be asked for a comment for the audit log.
- Delete a container — You can remove a container only if it’s empty. Move or delete the inventory first, then delete the container.
For a high-level view of items by location and container (and recent moves), check Insights → Locations & Containers.