
Checking items out and back in tracks who has custody of inventory—especially gear that goes to the field and returns. Use Check out when someone takes stock from a team location (e.g. armory or truck) to their personal inventory, and Check in when they return it to a location. The audit log records every check-in and check-out for accountability.
Checking out inventory (Editors and admins)
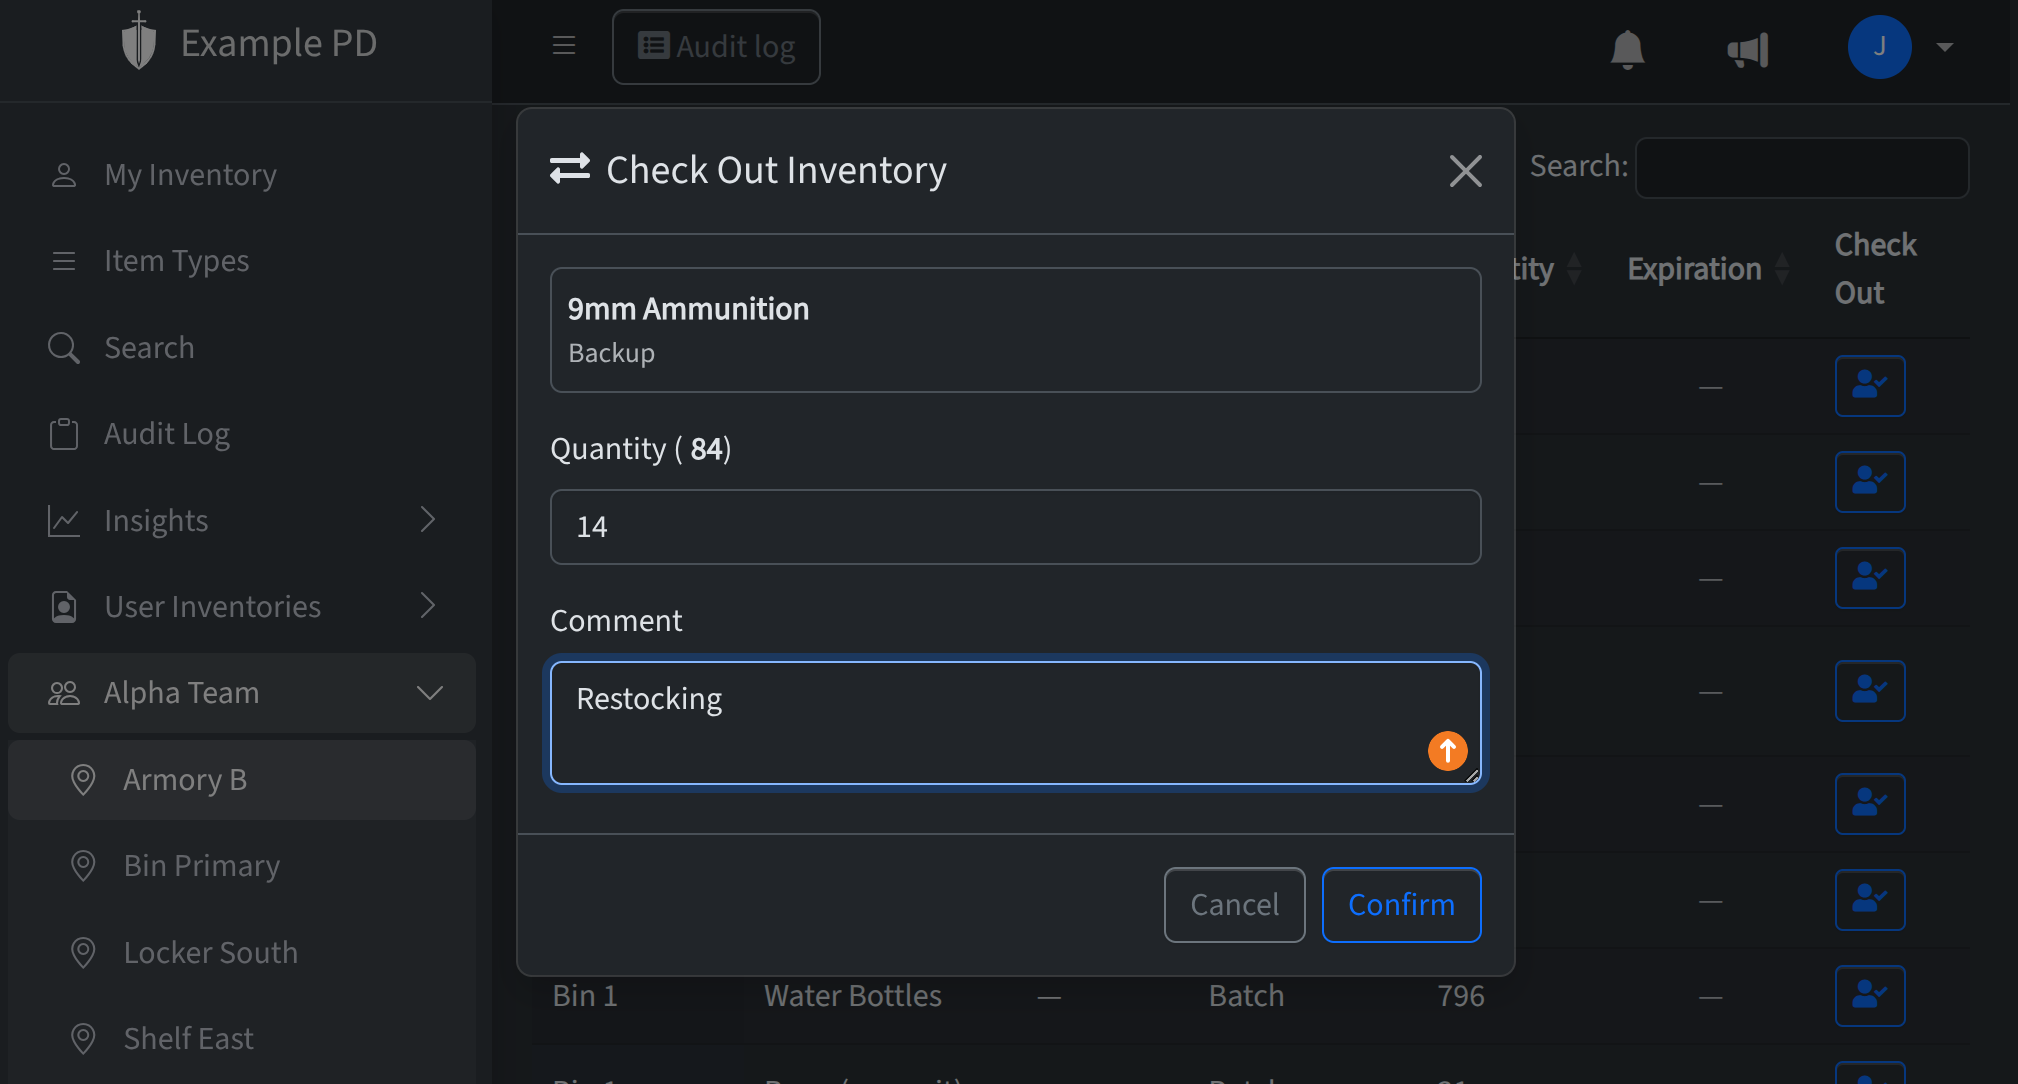
Open the location that currently holds the item (e.g. a team location in the sidebar). In the inventory list, find the row for that item and click Check out. The item is moved to your User Inventory (your personal location)—so it's now assigned to you. Enter the quantity to check out if it's a batch, or confirm for a single serialized unit. Submit and the quantity is deducted from the source location and added to your user inventory. The audit log records the check-out.
Checking inventory back in (Editors and admins)
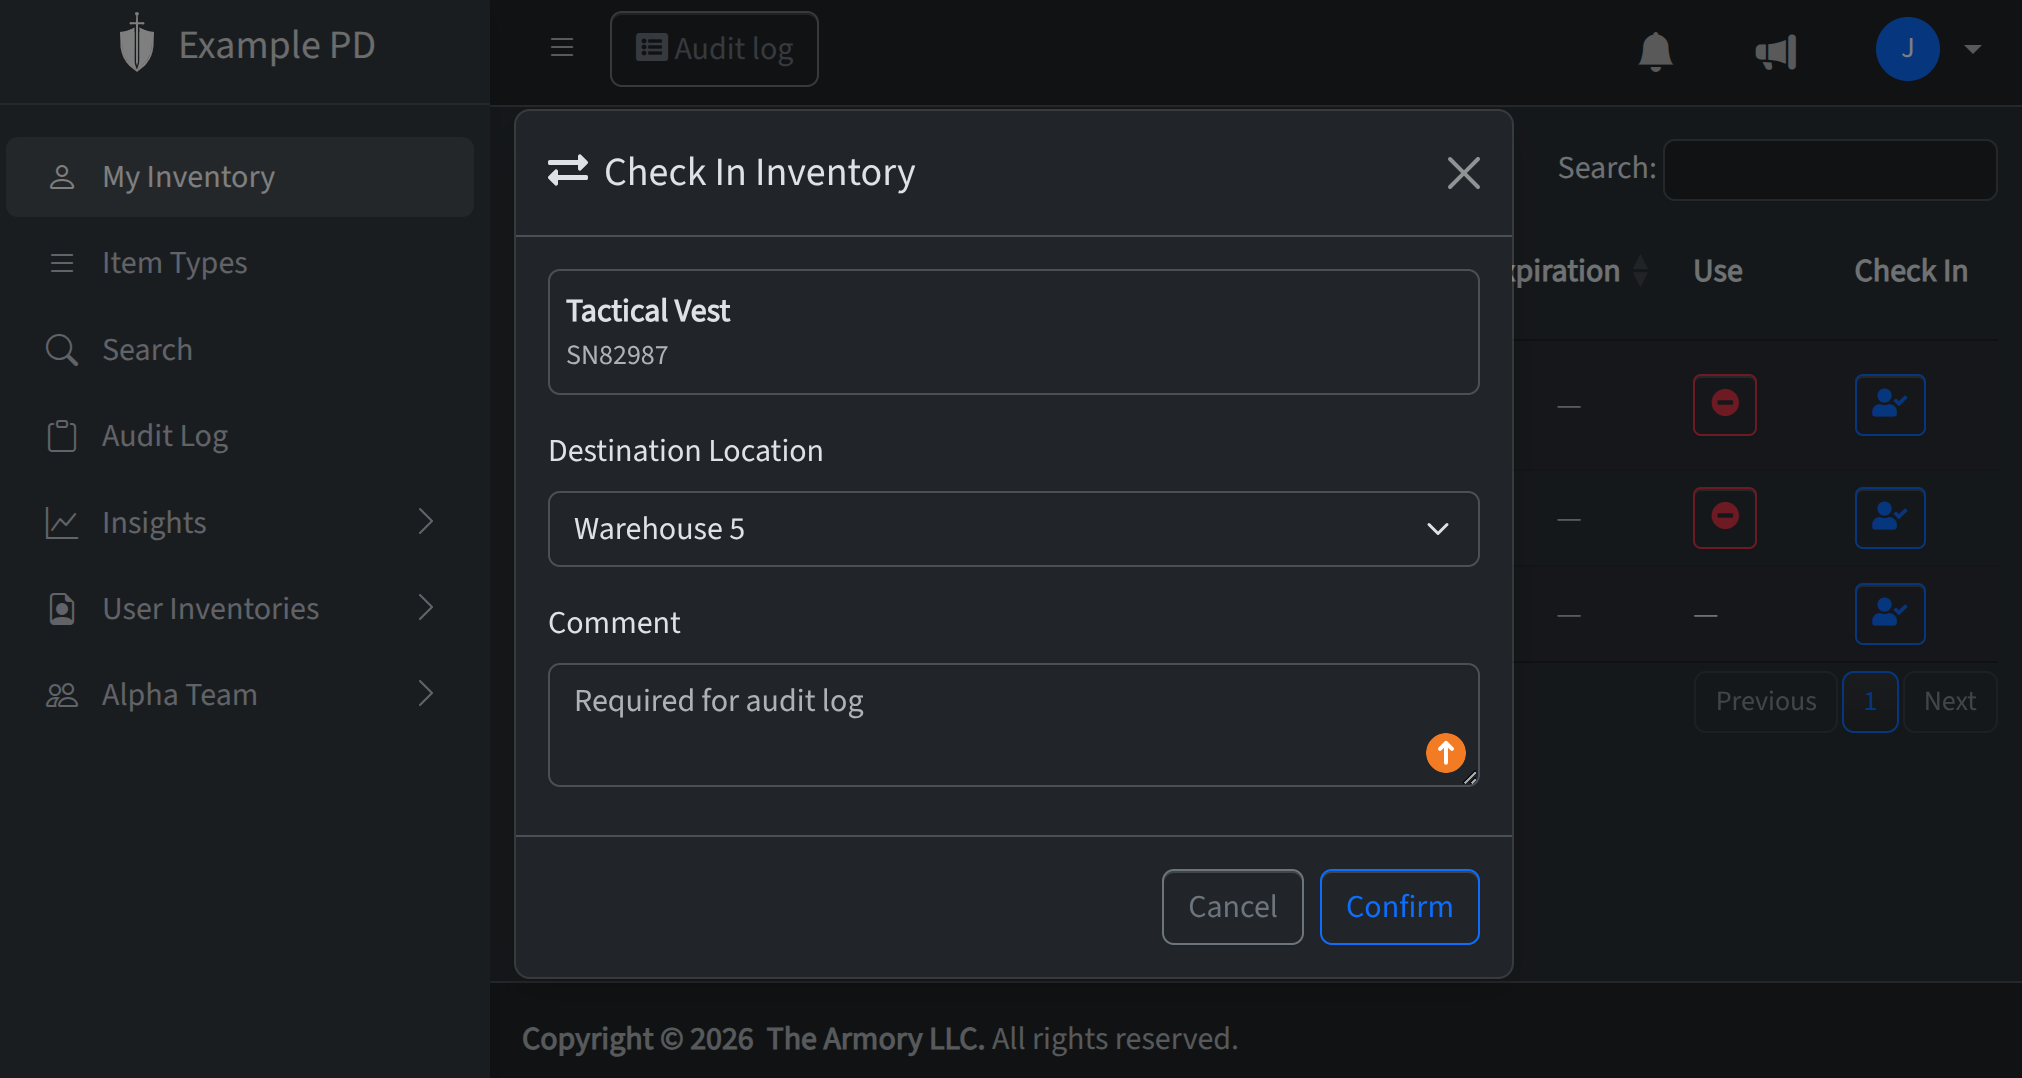
When you're ready to return items, use My Inventory—it's its own navigation item at the very top of the sidebar. Find the item and click Check in. In the form that appears, choose the destination—the location or container you're returning it to (e.g. "Armory Cage A", "Truck 1"). Enter the quantity to check in if it's a batch, then submit. The quantity moves from your user inventory to the destination and the audit log records the check-in.
Why check in/out
Check-in/check-out keeps a clear record of who had what and when. That supports accountability for gear, audits, and reporting. Only members and admins can check items in and out; viewers can see inventory but cannot perform these actions.