
Once you’ve got locations (and maybe containers) and item types set up, the next step is adding and maintaining inventory. Here’s how it works.
Opening a location’s inventory
In the sidebar, open your team and click the location (or a container inside it) you want to work with. You’ll see the inventory view for that place—all the item types and quantities there, or an empty page if nothing's been added yet. See Locations and Containers for how locations and boxes work together.
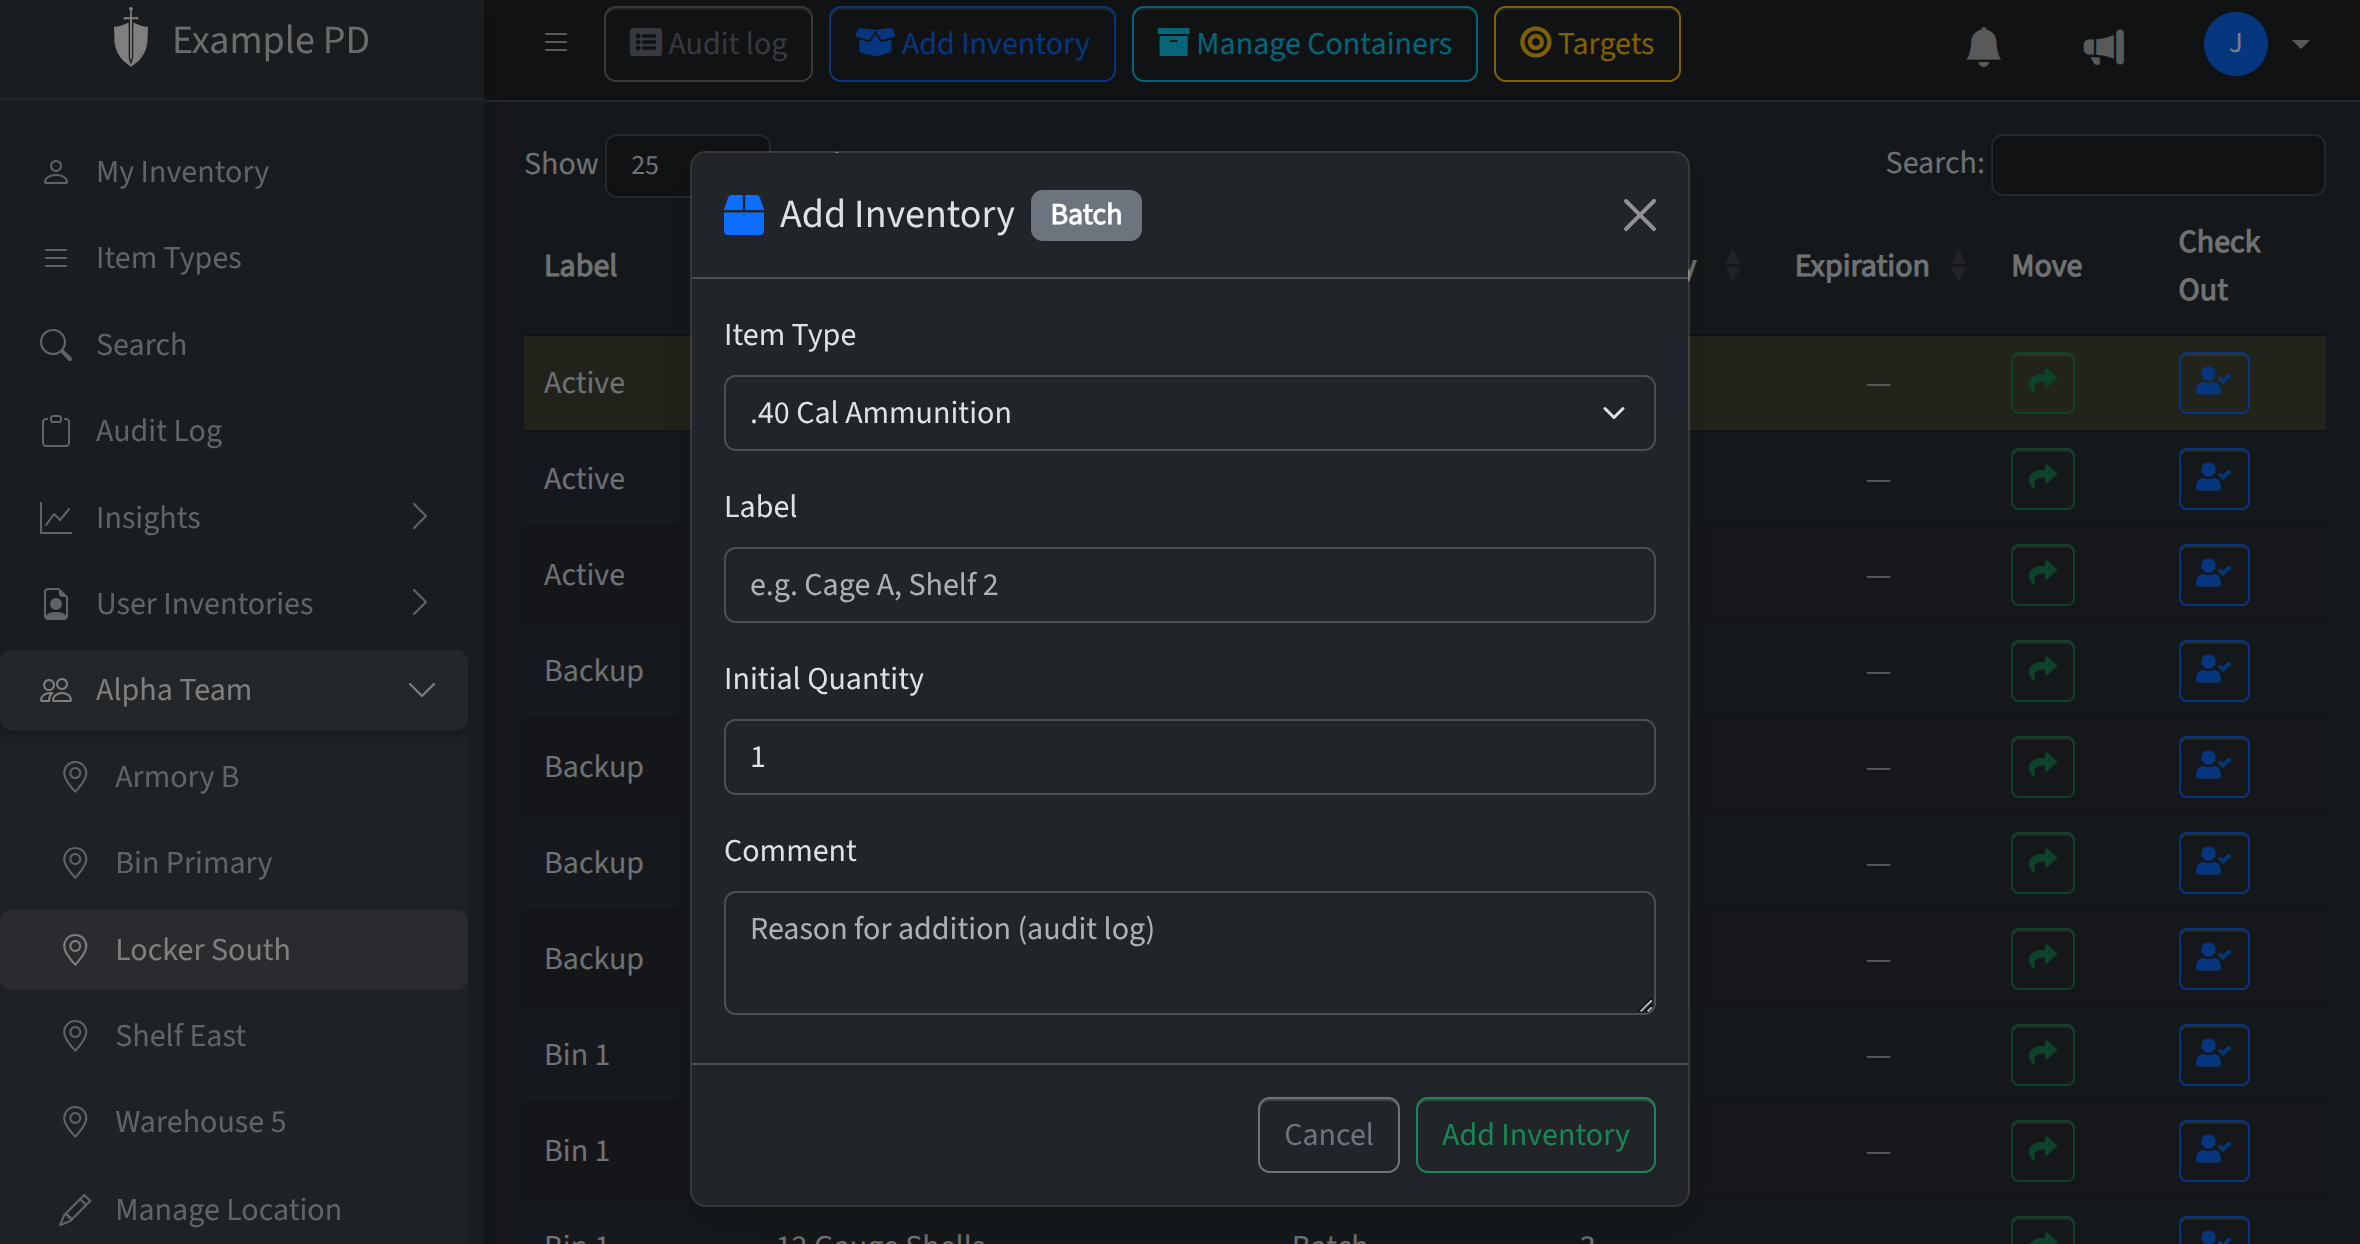
Adding inventory
Click Add inventory and choose the item type, quantity, and (if you use them) a label, serial number, or expiration date. Submit and the new row shows up in the list. You can add multiple rows for the same item type at the same location—e.g. different batches or shelves—and set targets or expiration per row as needed.
Updating a quantity (Editors and admins)
When a count changes—you’ve used some, received a shipment, or corrected a mistake—click into the quantity on that row and update it. The new count is saved and the audit log records the change. Members cannot modify counts directly; they can check in and check out items and use consumable gear.
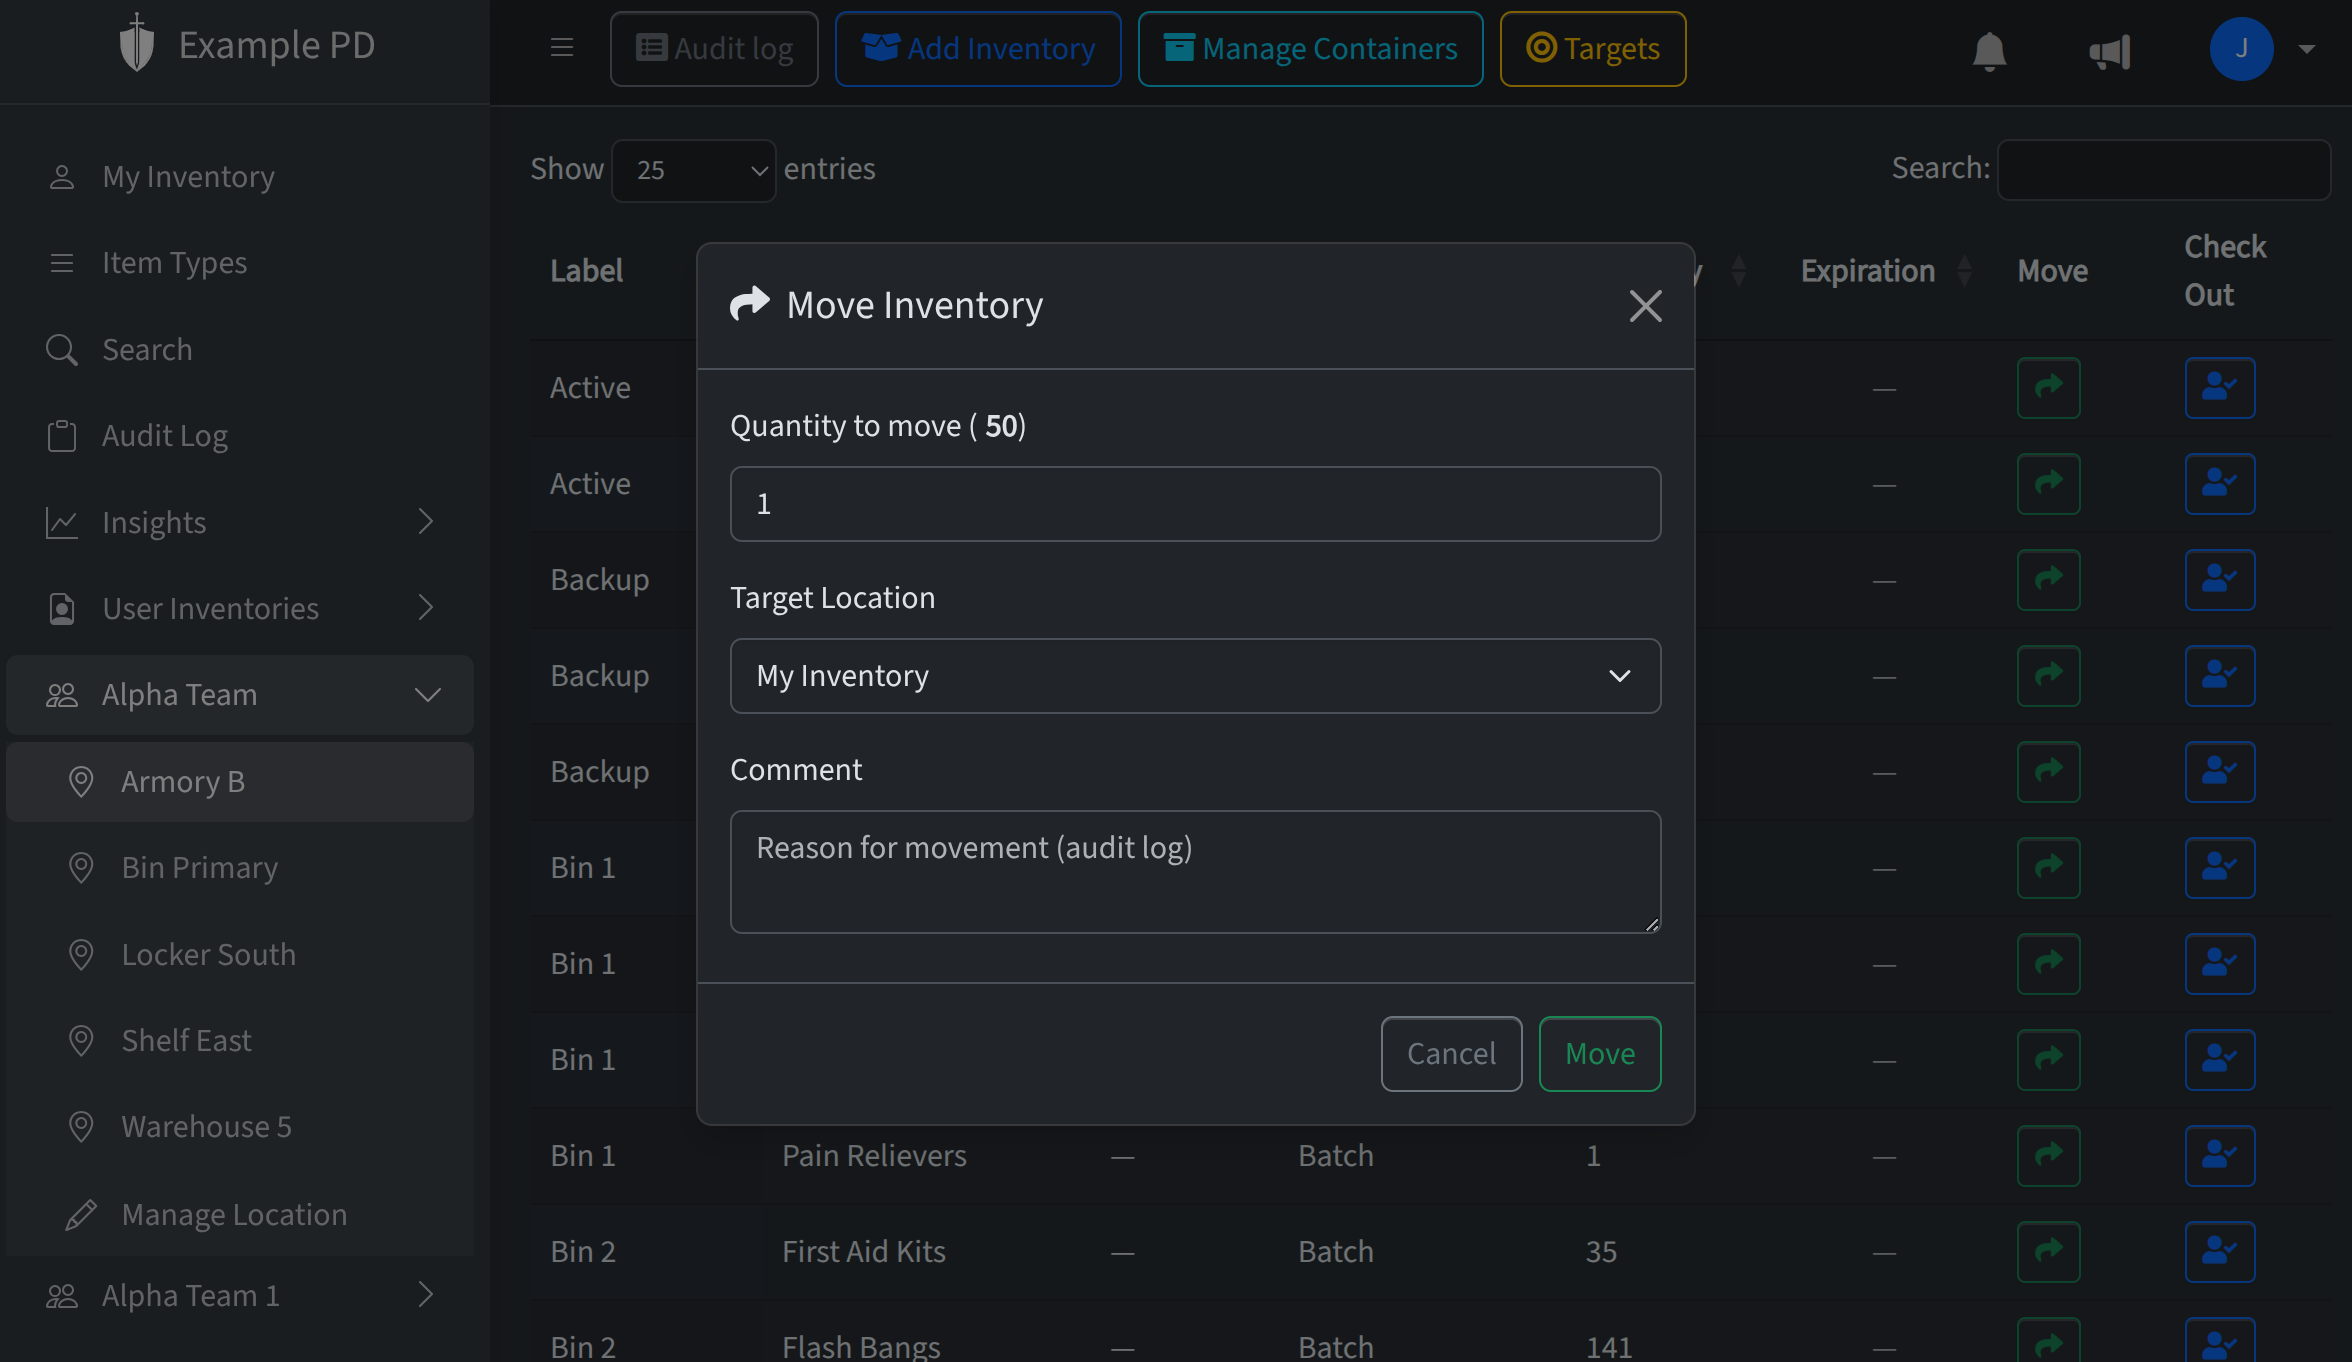
Moving inventory (Editors and admins)
To move stock from one location (or container) to another, use Move inventory. Pick the amount to move and the destination; the quantity is deducted from the current location and added to the destination. The audit log records the move. Members cannot move stock between locations; they can check in and check out items and use consumable gear.
That’s the core loop: add stock when it comes in, update counts as it’s used or adjusted, and move it when it changes place. For low-stock alerts and expiration reminders, see Low stock alerts and Setting item expirations.